I decided to start a small business on the side....figure I have nothing to lose :) Feel free to check out and like my new page on facebook,
https://www.facebook.com/pages/Blue-Butterfly-Renew/480009462040286?ref=hl
Thanks!!
Thursday 17 January 2013
Wednesday 16 January 2013
Homemade Chalkpaint
So I have been reading an awful lot about chalk paint and planned to try it. Unfortunately I can't find it to purchase around here and being the cheapo that I am I am not about to pay to have it shipped. I did find out that it is sold in Bracebridge!! That's where my family cottage is so next time I'm up there I'll pick some up and try it. In the mean time I stumbled upon a recipe for homemade chalk paint and thought I would try it. I wish I had the real thing to compare it with....hopefully soon!!
So I picked up these two beauties at a flea market...they are going to be my chalk paint guinea pigs :)

For the paint I mixed 2 heaping tablespoons of white unsanded grout with a little bit of hot water. I didn't measure how much water, I just added a few drops at a time til it was the same consistency of paint. I then added 2 cups of my Behr Ultra Premium in black suede the the mixture and stirred and stirred. I just made it all in a jar that I had drawn measurements on.
I then wiped down the tables with a damp rag and started painting. Notice I didn't sand or prime....apparently you don't need to with chalk paint. I hate the sanding part so this was just fine by me!!
First coat of paint...not too bad, it does feel chalky when dry and didn't cover completely.

Second coat...covered much better!! chalky feel but hardly and brush strokes


After distressing and applying a coat of Minwax Paste here are they are :)

Nice legs!!!


Thursday 10 January 2013
Running Out Of Room!!
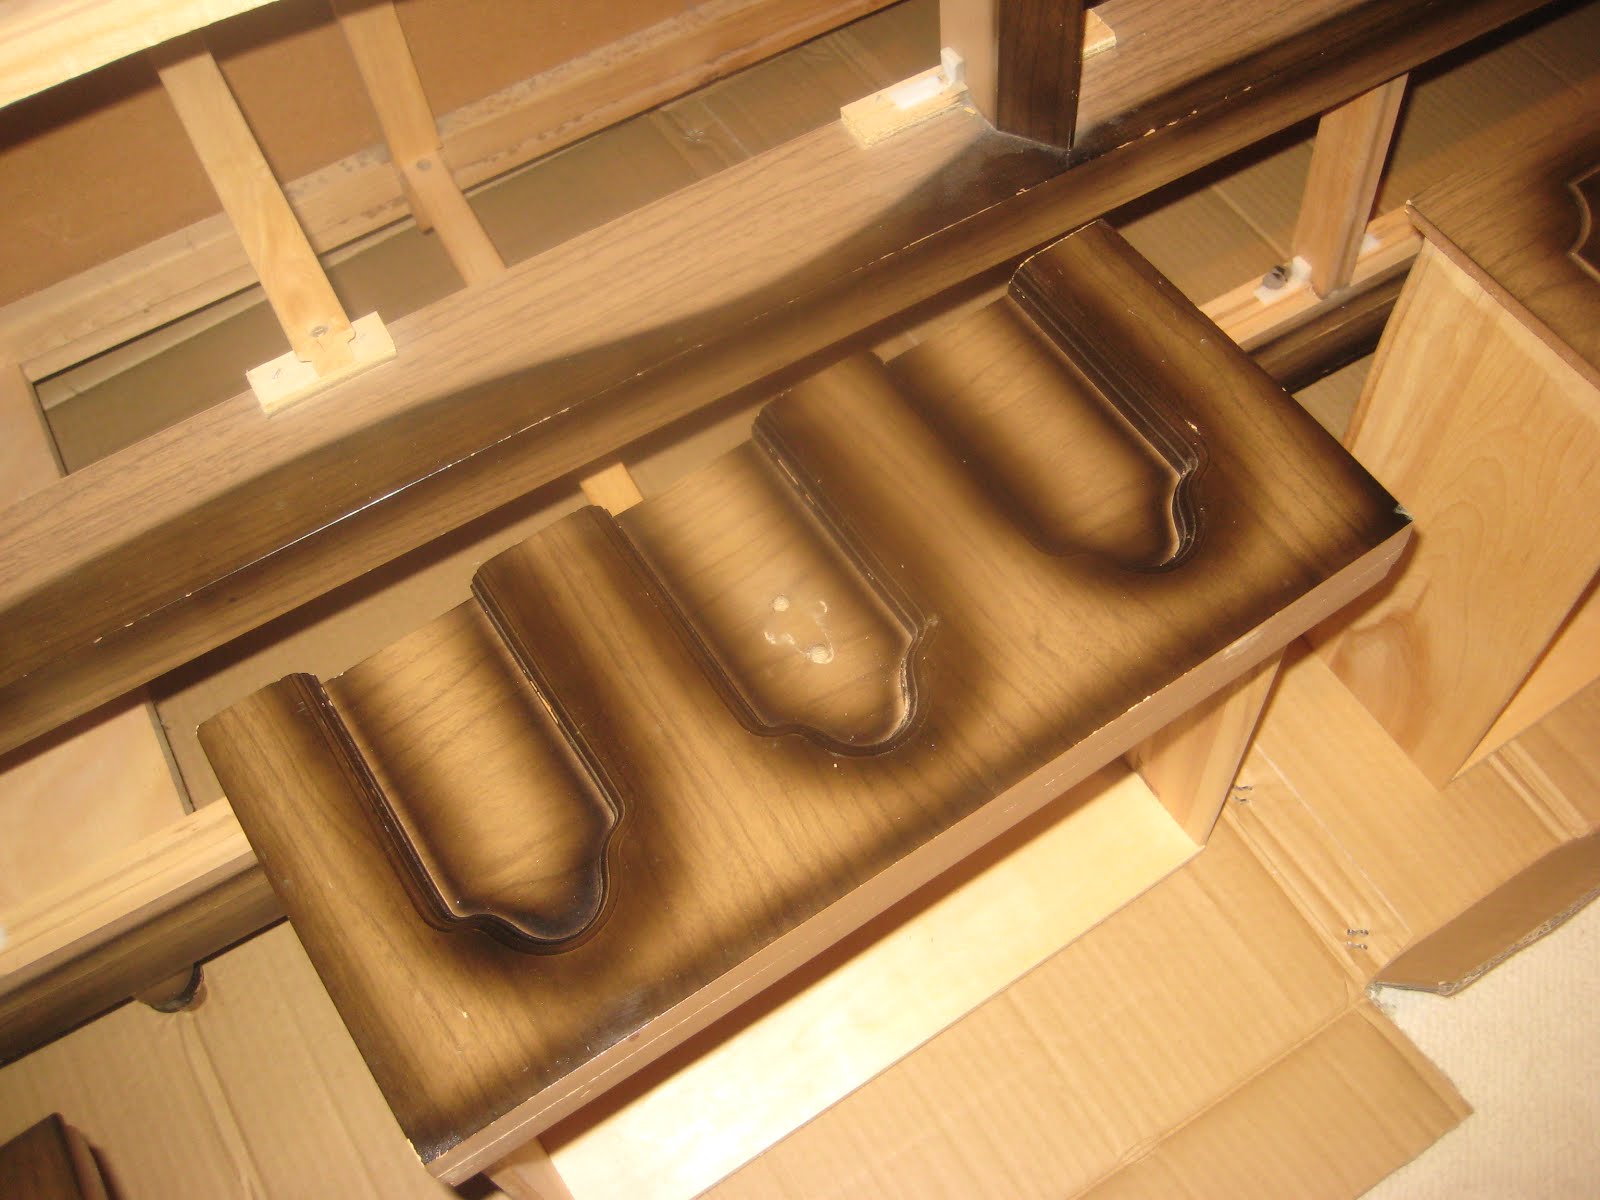
OK....so I have been a little busy!! I have so many projects on the go I have run out of room!! Unfortunately I don't have a garage so until Spring I am stuck doing all my projects inside.
This is my family room where I am working on a buffet for my parents as well as a dresser and end tables for myself.

Here is the $20.00 very shiny dresser for my parents to use as a buffet table (It came with a huge mirror as well!!)

My dresser for my family room redo...I love this piece!!!

The armoire (I love but am going to sell once done) is taking up space in my home office/craft room

Ready to sand!!


After the sanding...
I have to say I hate the sanding part!! I couldn't even get clear pic through all the dust particles. If I could do it outside (Bring on the summer!!!!), no problem but my house is now covered in dust!! Took me forever to clean up after!! I think I'll experiment with an oil based primer next time....I rather breath in the fumes then have to clean up after sanding!!

Finally the fun part!! Painting!!


Even my living room is full of furniture!! The coffee table set from my family room I'm selling on kijiji (Hope it sells fast!!) and a new to me $25.00 (kijiji) coffee table for my family room.

Phew...sold my coffee table set!! now to move my new one downstairs to work on.
Finally finished these!!!! Sorry, the pics are dark....I took them this evening. I'll take better ones during the day tomorrow.
The ugly shiny 70's dresser turned buffet for my parents dining room


My dresser and end tables for my familyroom


Now I can start my armoire!!!!
Saturday 5 January 2013
Happiness
You know you are either getting old or are totally obsessed with refurbishing (in my case probably both) when it's Friday night, the kids are with their dad after an entire week of being home with you (no school), the BF is working, your friends are calling you to go out......and yet there you are in line at Home Depot with sandpaper, wood filler and rollers in hand. I'm not even going to mention how excited I was to buy a new staple gun so I can finally recover my new Duncan Phyfe style lyre back chairs!! Who knew Home Depot could bring so much happiness!!!
Thursday 3 January 2013
Painting Laminate Countertops
So I was hoping to have started by now on my newest projects, however after a very busy Christmas and then even busier New Years (2 parties hosted at my house), I am still in the process of taking down my Christmas decorations!! In the mean time I bought another dresser off of Kijiji for $20.00 that I will add to my project list. I have no idea where I am going to put it, I have furniture scattered all over my house right now to work on lol.
Hopefully I will start the sanding on all the pieces this weekend.
While going through some pictures on my computer I came across the before and after pictures of my kitchen counter top redo. I thought I should post them here as they turned out great and holding up fairly well almost 3 years later. When I bought the house the kitchen was painted mint green and had ugly blue counter tops, it was awful! Now I do love the colour blue, in fact it is my favourite colour....but on counter tops?? Ummm....no!!!! I painted the entire house and had planned on getting new counter tops eventually. Two years later I was still staring (and hating) at these ugly counter tops as I just never had the extra money to replace them. I decided to research painting them. After hours were spent researching and watching you tube videos...I headed to Home Depot to purchase supplies. I think I spent about $50.00 on supplies. I figured if it didn't work no great loss, besides....nothing can be worse than the ugly blue that they already were.
Ok...ready? Prepare yourself...its not pretty

Ewwwww!! right?? Imagine it with the mint green walls!!!
*Side note - how come I can only enlarge my first picture on my posts??????


The paint I used.................

Hopefully I will start the sanding on all the pieces this weekend.
While going through some pictures on my computer I came across the before and after pictures of my kitchen counter top redo. I thought I should post them here as they turned out great and holding up fairly well almost 3 years later. When I bought the house the kitchen was painted mint green and had ugly blue counter tops, it was awful! Now I do love the colour blue, in fact it is my favourite colour....but on counter tops?? Ummm....no!!!! I painted the entire house and had planned on getting new counter tops eventually. Two years later I was still staring (and hating) at these ugly counter tops as I just never had the extra money to replace them. I decided to research painting them. After hours were spent researching and watching you tube videos...I headed to Home Depot to purchase supplies. I think I spent about $50.00 on supplies. I figured if it didn't work no great loss, besides....nothing can be worse than the ugly blue that they already were.
Ok...ready? Prepare yourself...its not pretty

Ewwwww!! right?? Imagine it with the mint green walls!!!
*Side note - how come I can only enlarge my first picture on my posts??????


So I started by taping and sanding. I just gave them a light sanding to scuff them up a bit. I then cleaned them with vinegar and water.
Once dry I applied a coat of CIL Smart Any Where Primer

They already look way better with just the primer!!! I used a brush for edges and hard to reach places and a small roller for the rest.

I just did one coat and let it dry overnight. I then rolled on my paint, using my brush again for hard to reach places. I used CIL Smart Furniture and Cabinets Melamine Finish. The colour is Monterey Cliff.


I applied 2 coats....letting the first coat dry overnight.
Here is the finished project.................

Please excuse the dark pics....my New Years resolution is to not be lazy and pull out my real camera instead of using my Iphone for pics from this day on.


So much better than the blue!!!!

The paint I used.................

I didn't put anything else on for protection as I was worried about the chemicals and I didn't want a glossy finish. So far they have held up way better than I expected!!! There are a few scratches as my boys seem to have no idea what the big wooden cutting board is used for (I have actually caught them moving it out of the way to cut up food!). They are easy enough to fix up though...a little sanding, primer and paint. I just haven't done it yet as it really isn't bad at all. If my kitchen wasn't such a mess right now I would take a picture and show you how well they have help up....I'll have to do that later :)
Friday 28 December 2012
My Paint of Choice
Hi, Christmas is over (what a crazy time!!) and I can start to get my house back in order!! I don't know if anyone can relate but I can not function in chaos lol. I am dying to start my new projects but can't until the rest of the house is in order. I still am finding peices of wrapping paper everywhere lol.
I'm hoping to start with the sanding next week in the new year.
In the mean time I thought I would share with everyone the paint used in all of my projects so far. I see that many of you Bloggers use chalk paint or milk paint. So far I have had great success with Behr Premium Plus Ultra. No Primer needed...just light sanding and two coats of paint. I even used it on my cheap laminate bookcases (needed 3 coats though as I dont think I sanded quite enough on those).
 I have three boys so over time I will see how well it holds up....so far so good!! Even with the kids playing mini sticks in their game room downstairs!!
I'm hoping to start with the sanding next week in the new year.
In the mean time I thought I would share with everyone the paint used in all of my projects so far. I see that many of you Bloggers use chalk paint or milk paint. So far I have had great success with Behr Premium Plus Ultra. No Primer needed...just light sanding and two coats of paint. I even used it on my cheap laminate bookcases (needed 3 coats though as I dont think I sanded quite enough on those).

Wednesday 19 December 2012
Painted Vinyl Ottoman...Yes Painted!!
So I read somewhere that you can paint vinyl furniture with a special spray paint from the automotive store. I was pretty sceptical and figured it would crack but wanted to try it. I had an extremely old and ugly vinyl bench thingy that was an ugly reddish brown that was left in my laundry room by the previous owners. I was using it to store paint cans on. I wish I had taken a before picture but I forgot. I decided it would be my guinea pig so I washed it, purchased 2 cans of the spray paint and sprayed away. I did about 4 coats and to my surprise it turned out beautiful! You would never know it is painted and it doesn't crack...at all!! Here are some pics of the finished product....


Home Office Furniture Before and After
Finished my home office furniture!
BEFORE

AFTER


I even painted the filing cabinet!!
BEFORE

AFTER

I'll post pictures of the room once I have finished putting it back together.
Subscribe to:
Posts (Atom)